
Limited-Time Offer: Enjoy 50% Savings! Ends in 00h 00m 00s Coupon code: 50OFF
Skip to content

Free Dell EMC Dell PowerMax Operate v.2 D-PVM-OE-01 Exam Questions

Page: 1 / 9 Total 49 questions

Want more questions? Get Premium Access.

Question 1

An administrator is using the Workload Planner feature in Unisphere for PowerMax

How does the Planner calculate if the Storage Group workload is stable?

Correct Answer: D. Both calculated values are within the SL-defined response time.
Explanation:

Step by Step Comprehensive Detailed

The Workload Planner in Unisphere for PowerMax helps you analyze and predict the performance impact of adding new workloads to your storage array. It uses sophisticated algorithms to calculate how the addition of a new workload will affect the existing workloads and whether it will violate any service level objectives (SLOs).

To determine if a Storage Group workload is stable, the Planner considers two key calculated values:

Read Response Time: The predicted read response time of the Storage Group after the new workload is added.

Write Response Time: The predicted write response time of the Storage Group after the new workload is added.

The Planner compares these calculated values against the service level (SL) defined for the Storage Group. If both the calculated read and write response times fall within the defined SL response time, the Planner considers the workload to be stable. This means that the new workload can be added without negatively impacting the performance of the existing workloads or violating the SLOs.

Why other options are incorrect:

A . One of the calculated values is within 10-20% of the SL-defined response time: Both read and write response times must be within the defined SL, not just one.

B . Both calculated values are within a 10-15% threshold of the SL-defined response time: The threshold is not fixed at 10-15%. The calculated values must be within the actual SL-defined response time.

C . One of the calculated values remains within the SL-defined response time: Again, both read and write response times need to be within the defined SL.

Reference and documents of Dell's public documentation for PowerMax Operate v.2:

Dell Unisphere for PowerMax 10.0.0 Online Help: The online help for Unisphere provides detailed information about the Workload Planner feature, including how it calculates and analyzes workload stability. You can access this help within Unisphere itself or on the Dell Support website.

Dell PowerMax Family: Essentials and Best Practices Guide: This guide may offer general information about performance management and workload planning in PowerMax, providing context for understanding the Workload Planner's functionality.

Question 2

A Storage Group is serving host read/write I/O. The Storage Administrator started an MDM migration and ran a symdm sync -stop command, putting the migration in a CutoverNoSync migration state

Where does the customer data in the Storage Group reside?

Correct Answer: C. On both the source and the target array
Explanation:

Step by Step Comprehensive Detailed

In an MDM (Migration for Dell EMC) migration, data is moved from a source array to a target array. When the symdm sync -stop command is issued, it puts the migration into the CutoverNoSync state. This state signifies that:

Synchronization Stopped: Active data synchronization between the source and target arrays has been stopped.

Data on Both Arrays: However, the customer data still resides on both the source and target arrays. This is because the CutoverNoSync state is a transitional state that allows for a controlled cutover to the target array.

The next step would typically involve a cutover operation, where host access is switched to the target array, and the source array is removed from the migration configuration.

Why other options are incorrect:

A . Only the target array: While the goal is to eventually have the data only on the target, in the CutoverNoSync state, data still exists on both arrays.

B . Only on the source array: Data has already been partially or fully copied to the target array during the migration process.

Reference and documents of Dell's public documentation for PowerMax Operate v.2:

Dell Solutions Enabler 10.0.0 CLI User Guide: This guide provides detailed information about the symdm command and its various options, including the sync -stop command and the CutoverNoSync state. You can find this document on the Dell Support website by searching for 'Solutions Enabler CLI User Guide.'

Dell PowerMax Family: Essentials and Best Practices Guide: This guide may offer general information about data migration and the different states involved in the process.


Question 3

Four snapshots of a single source volume have been created. The snapshots were created with the same name at 8:00 AM, 10:00 AM, 12:00 PM: and 2:00 PM.

What is the generation number of the snapshot created at 2:00 PM?

Correct Answer: D. 3
Explanation:

Step by Step Comprehensive Detailed

In TimeFinder SnapVX, snapshots of a source volume are assigned generation numbers. These numbers indicate the order in which the snapshots were created. The first snapshot taken has a generation number of 0, the second has 1, and so on.

In this case, four snapshots were created at different times:

8:00 AM (Generation 0)

10:00 AM (Generation 1)

12:00 PM (Generation 2)

2:00 PM (Generation 3)

Therefore, the snapshot created at 2:00 PM has a generation number of 3.

Reference and documents of Dell's public documentation for PowerMax Operate v.2:

Dell Solutions Enabler 10.0.0 TimeFinder SnapVX CLI User Guide: This guide provides detailed information about SnapVX features and functionalities, including how generation numbers are assigned to snapshots. You can find this document on the Dell Support website by searching for 'Solutions Enabler TimeFinder SnapVX CLI User Guide.'


Question 4

What does the symcf g discover command do when upgrading Solutions Enabler on a Linux host1?

Correct Answer: A. Identifies the running SE version
Explanation:

Step by Step Comprehensive Detailed

When upgrading Solutions Enabler (SE) on a Linux host, the symcfg discover command plays a crucial role in preparing for the upgrade. Its primary function in this context is to:

Identify the running SE version: Before proceeding with the upgrade, it's essential to know the current version of Solutions Enabler installed on the host. The symcfg discover command gathers information about the existing SE environment, including the version number. This information is used to determine the appropriate upgrade path and ensure compatibility.

Why other options are incorrect:

B . Verifies that the SE daemons have been stopped: While stopping SE daemons is a necessary step before the upgrade, it's not the function of the symcfg discover command.

C . Builds the SYMAPI database: The SYMAPI database is typically built during the initial installation or after a fresh discovery.

D . Creates backups of the configuration directories: Backups are important, but they are usually handled separately as part of the upgrade process, not by the symcfg discover command itself.

Reference and documents of Dell's public documentation for PowerMax Operate v.2:

Dell Solutions Enabler 10.0.0 Installation Guide: This guide provides detailed instructions for upgrading Solutions Enabler on different operating systems, including Linux. It explains the steps involved and the role of the symcfg discover command in the upgrade process. You can find this document on the Dell Support website by searching for 'Solutions Enabler Installation Guide.'


Question 5

A systems administrator plans to use Non-Disruptive Migration (NDM) to migrate data (rom a VMAX array running Enginuity 5876 to a PowerMax running PowerMaxOS 5978

Which NDM mode is used?

Correct Answer: B. Adaptive Copy
Explanation:

Step by Step Comprehensive Detailed

Non-Disruptive Migration (NDM) in PowerMax offers different modes for migrating data between storage arrays. When migrating from a VMAX array running Enginuity 5876 to a PowerMax running PowerMaxOS 5978, the Adaptive Copy mode is used.

Adaptive Copy mode is designed for migrations between different storage array platforms or microcode versions. It provides flexibility and efficiency by dynamically adjusting the migration process based on the source and target array capabilities.

Why other options are incorrect:

A . Asynchronous: This mode is typically used for SRDF replication, not NDM.

C . Pass-through: This mode is not relevant to NDM.

D . Metro-based: This mode is used for specific metro distance configurations in SRDF.

Reference and documents of Dell's public documentation for PowerMax Operate v.2:

Dell PowerMax Family: Essentials and Best Practices Guide: This guide provides an overview of NDM and its different modes, including Adaptive Copy. It also discusses the scenarios where each mode is applicable.

Dell Solutions Enabler 10.0.0 CLI User Guide: This guide may provide further details about NDM commands and options, including how to specify the migration mode.


Question 6

SIMULATION

A customer has a clone session for the storage group DATA that is no longer needed.

Using the simulator, terminate the clone session for the storage group.

Correct Answer: A. See the explanation for step by step solution
Explanation:

We need to terminate a clone session for the storage group named 'DATA' in the Unisphere for PowerMax simulator.

Here's a step-by-step guide on how to do this, based on typical Unisphere functionality and the context of the question:

Steps:

1. Launch the Simulator and Navigate to the TimeFinder/Clone Section

Open Unisphere for PowerMax in your web browser.

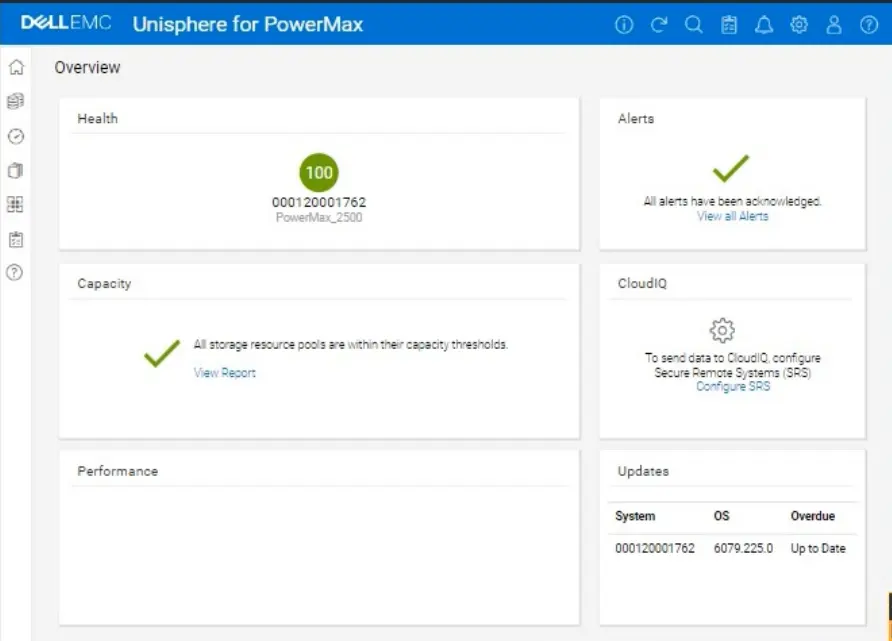
Log in to the simulator (you should already be logged in with the array SID 1762 selected, based on the provided image).

In the left-hand navigation pane, locate the section related to TimeFinder operations. This is usually found under:

Data Protection

Local Protection

TimeFinder

Expand the relevant sections and click on TimeFinder SnapVX or TimeFinder Clone (the exact wording might vary slightly in the simulator). The goal is to get to the view where you can manage clone sessions.

2. Locate the Clone Session for the 'DATA' Storage Group

The TimeFinder/Clone view will display a list of existing clone sessions.

You need to find the session associated with the 'DATA' storage group. Look for the following:

Storage Group Name: The 'DATA' storage group should be listed as the source of the clone session.

Session Type/Mode: Verify that it's a Clone session (not a SnapVX snapshot or another type of session).

3. Select the Clone Session

Once you've found the correct clone session for the 'DATA' storage group, select it.

You can usually do this by:

Clicking a checkbox next to the session.

Clicking on the session itself (if the interface allows it).

4. Terminate the Clone Session

After selecting the clone session, look for an action button or menu option to terminate it. This might be labeled:

'Terminate'

'Delete'

'Remove'

'Fracture' (in some older versions)

'Stop'

Click the appropriate button to initiate the termination process.

Confirmation: You will likely be prompted with a confirmation message to ensure you want to terminate the selected clone session. Verify that you have selected the correct session (the one for the 'DATA' storage group) and confirm the termination.